


Looking for a suitable motor?


小编
Published2025-10-15
Imagine a world where tiny motors dance to your command, moving precisely to turn your ideas into reality. That’s the magic of servo motors, and when paired with the versatile Arduino Uno, they become a powerhouse for countless projects—robotic arms, camera gimbals, automated curtains, and so much more. If you’ve ever wondered how to make your projects more dynamic, precise, and engaging, understanding how to use servo motors with Arduino Uno is your first step into this exciting realm.
Why Choose Servo Motors? Servo motors are a special type of motor designed for precise control of angular position. Unlike standard DC motors that spin freely, servo motors have built-in feedback mechanisms and control circuitry, allowing you to command specific angles or positions—even for applications requiring fractional degrees of accuracy. This makes them invaluable in robotics, remote control vehicles, CNC machines, and anything that demands controlled motion.
The Arduino Uno The Arduino Uno is a versatile microcontroller board that has become a staple for hobbyists and professionals alike. Its simplicity, ample I/O pins, and wide community support make it the ideal platform for experimenting with servo motors. Most importantly, Arduino’s programming environment simplifies motor control through dedicated libraries, making it easy for newcomers to get started and allowing experienced makers to develop complex projects effortlessly.
Getting Started: Components and Setup To embark on your servo motor journey with Arduino Uno, gather the following essentials:
Arduino Uno microcontroller board Standard servo motor (or multiple if your project requires) Jumper wires for connections Power supply (usually the Arduino’s 5V supply for small servos, but larger servos may require an external power source) Breadboard (optional but helpful for prototyping) Arduino IDE software installed on your computer
Understanding the Wiring Connecting a servo motor to an Arduino Uno is straightforward:
The servo has three wires: usually red (power), black or brown (ground), and yellow or white (signal). Connect the red power wire to the Arduino’s 5V pin. Connect the black/brown ground wire to one of Arduino’s GND pins. Connect the signal wire to a PWM-capable digital pin (e.g., pin 9). It’s important to ensure the servo’s power supply can handle the current draw—especially if you’re using multiple servos or larger models—since powering servos directly from the Arduino can sometimes cause voltage dips or resets.
Programming Basics: Controlling the Servo Before coding, ensure you have the Servo library included in your Arduino IDE:
The Servo library streamlines controlling the motor’s position with simple commands:
Create a servo object: Servo myServo; Attach it to a pin: myServo.attach(9); Write a position in degrees: myServo.write(90); (for centered position) Detach it if needed: myServo.detach();
A simple code snippet to sweep the servo from 0 to 180 degrees and back:
#include Servo myServo; void setup() { myServo.attach(9); // Attach servo on pin 9 } void loop() { for (int pos = 0; pos <= 180; pos += 1) { myServo.write(pos); // Move to position delay(15); // Wait for servo to reach position } for (int pos = 180; pos >= 0; pos -= 1) { myServo.write(pos); delay(15); } }
This simple loop allows your servo to smoothly sweep back and forth, demonstrating fundamental control.
Advanced Control: Speed, Acceleration, and Feedback While the basic commands are sufficient for many projects, advanced control can be achieved through:
Adjusting the delay for speed control Using sensors (like potentiometers or encoders) to send real-time position data Implementing PID control for high-precision tasks
Power considerations should not be overlooked. For small, low-current servos, the Arduino’s 5V supply is usually enough. For larger or multiple servos, a dedicated external power source—like a 6V or 7.2V battery pack—is recommended. Always remember to connect the grounds together to maintain a common reference point for signals.
Troubleshooting common issues
Servo jitter or not moving: Check power connections, ensure the signal pin is correctly assigned, and verify that the servo isn’t overloaded. Arduino resets when powering servos: Use an external power source to prevent voltage dips. Servo isn’t moving to the intended position: Double-check wiring, the signal pin, and confirm the code’s position values.
Innovative Applications Once you’ve mastered basic control, the possibilities expand exponentially:
Build a robotic arm with multiple servos for precise manipulation Create an automated door or window mechanism Develop a 360-degree pan and tilt camera system Design a remote-controlled vehicle with steering and throttle controls Integrate sensors to enable obstacle detection and autonomous responses
The journey of working with servo motors is as much about experimentation as it is about coding. Each project teaches something new, from power management to mechanical design. Arduino Uno provides a beginner-friendly yet powerful platform to explore these concepts and push the limits of what you can achieve at home or in a classroom.
Future Trends and Tips As technology advances, servo motors have become more sophisticated—offering digital control, higher torque, and better precision. Keeping up with new developments can open doors for even more complex projects like drone stabilization, robotic grippers, or prosthetic devices. Also, consider upgrading your power supplies, incorporating wireless control modules (like Bluetooth or Wi-Fi), and exploring other microcontrollers that can handle higher loads or more complex algorithms.
Finally, don’t forget to document your projects, share your experiences, and participate in maker communities. Whether you prefer casual tinkering or serious automation, mastering servo motors with Arduino Uno is a confident step forward. Every rotation, every movement, becomes a testament to your growing skills and creativity. So, power up your Arduino, connect a servo, and watch your ideas come alive—one precise movement at a time.
Delving deeper into servo motor applications with Arduino Uno reveals a world of precision, automation, and intricate movements that can take your projects from good to extraordinary. As you gain confidence controlling single servos, your next challenge might involve managing multiple motors simultaneously, creating complex movement patterns, or integrating sensors for feedback-driven systems. Let’s explore these advanced techniques, best practices, and some inspiring projects that showcase the full potential of servo motors in conjunction with Arduino Uno.
Controlling Multiple Servos Most hobbyists gravitate toward simple projects initially, but real-world applications often require multiple servos operating in tandem. For example, a robotic arm might need several joints, each driven by a servo. Managing multiple motors demands careful wiring, power planning, and code structuring.
Wiring: Use separate power lines for each servo, ideally with their own power supply, but share grounds. Coding: Instantiate multiple servo objects, attach each to different pins, and then control them individually or in synchronized sequences. For example: #include Servo servo1; Servo servo2; void setup() { servo1.attach(9); servo2.attach(10); } void loop() { servo1.write(0); // Move servo1 to 0 degrees delay(1000); servo2.write(180); // Move servo2 to 180 degrees delay(1000); // You can add more complex synchronized movements here }
Synchronization of multiple servos can be achieved using timed loops, interrupted routines, or advanced control algorithms, especially when precise coordination is critical.
Implementing Feedback and Sensors Adding sensors to your servo projects transforms static movement into responsive, intelligent control:
Potentiometers: Provide position feedback, allowing closed-loop control. Ultrasonic or IR sensors: Enable obstacle avoidance or environmental interaction. Accelerometers or gyroscopes: Facilitate stabilization and orientation sensing.
Incorporating feedback involves reading sensor data (analog or digital inputs), processing it (possibly with algorithms or PID controllers), and adjusting servo positions accordingly. For instance, in a balancing robot, a gyroscope feedback loop can keep the device upright by continuously adjusting motor angles.
For example, using a potentiometer:
#include Servo myServo; int sensorPin = A0; // Potentiometer connected to analog pin A0 void setup() { myServo.attach(9); } void loop() { int sensorValue = analogRead(sensorPin); int angle = map(sensorValue, 0, 1023, 0, 180); // Map sensor value to angle myServo.write(angle); delay(15); }
This simple feedback loop demonstrates how sensor inputs directly influence servo movement, creating a more interactive project.
Smooth Movement and Acceleration Moving servos instantly from one position to another can cause jerky movements or mechanical stress. Implementing acceleration control makes transitions smooth, mimicking natural motions:
Incrementally change servo positions over several small steps Use easing functions or motion profiles to affect acceleration/deceleration
Here's a straightforward example:
void moveServo(int startPos, int endPos, int stepDelay) { int stepSize = (endPos > startPos) ? 1 : -1; for (int pos = startPos; pos != endPos; pos += stepSize) { myServo.write(pos); delay(stepDelay); } myServo.write(endPos); // Ensure final position }
Such techniques are vital in applications like camera gimbals, robotic limbs, or animatronics where fluid motion enhances realism and functionality.
Handling Power and Mechanical Stress Power management remains a core concern whenever multiple servos are involved:
Always use an external power supply when working with several or large servos Use capacitors to smooth out power lines and reduce voltage spikes Ensure wiring is secure to prevent accidental disconnections Limit the servos’ running torque if possible, as overloading can lead to mechanical failures
Mechanical considerations include:
Choosing appropriate gearboxes or linkages for your application Ensuring structural stability to avoid strain on servo horns Using materials that withstand repetitive motion and stress
Experiment with different gears, linkages, or 3D-printed mounts to optimize movement and durability. The mechanical design often significantly impacts the performance and lifespan of your servo-driven projects.
Creating Complex Movement Sequences Beyond simple sweep or position commands, you can design multi-step sequences for advanced tasks:
Pick-and-place robots Automated focusing systems Animatronic figures with synchronized limb movements
Using arrays and delay-based timing, combined with functions to define movement sequences, can achieve these complex motions. For example:
struct Movement { int servo1Pos; int servo2Pos; int delayTime; }; // Define a sequence Movement sequence[] = { {0, 0, 500}, {90, 45, 1000}, {180, 90, 500}, {90, 45, 1000}, {0, 0, 500} }; void executeSequence() { for (int i = 0; i < sizeof(sequence) / sizeof(sequence[0]); i++) { servo1.write(sequence[i].servo1Pos); servo2.write(sequence[i].servo2Pos); delay(sequence[i].delayTime); } }
This approach allows for scalable and flexible movement programming, suitable for more sophisticated automation systems.
Exploring Beyond Basic Arduino Projects Once comfortable with controlling multiple servos, feedback, and complex sequences, consider exploring:
Integrating Bluetooth or Wi-Fi modules for remote control Using real-time operating systems (RTOS) to manage multiple tasks Experimenting with different servo types, like digital servos, for faster response Implementing machine learning algorithms for adaptive control
These advancements open new horizons for autonomous robots, interactive art installations, or even educational tools—making your projects not just functional, but also innovative.
Community and Resources Engaging with maker communities, online forums, and open-source projects can accelerate your learning curve:
Arduino forums for troubleshooting and shared code YouTube tutorials showcasing exciting servo projects Open-source libraries that extend functionality Local maker groups or robotics clubs for hands-on workshops
Document your projects thoroughly, share your successes and failures, and continually challenge yourself with new ideas. Each servo movement you program is a step towards mastering a skill that combines electronics, programming, and mechanical design into expressive, practical creations.
In conclusion, using servo motors with Arduino Uno is more than just making motors turn. It’s about creating a language of motion—precise, programmable, and increasingly intelligent—that empowers you to turn your visions into reality. Whether it’s building a simple robotic arm, creating an interactive art piece, or designing a self-balancing robot, the principles remain consistent: plan your movements, understand your hardware’s limits, and push the boundaries of what’s possible. The world of servo motors is vast and inviting; your exploration has only just begun.
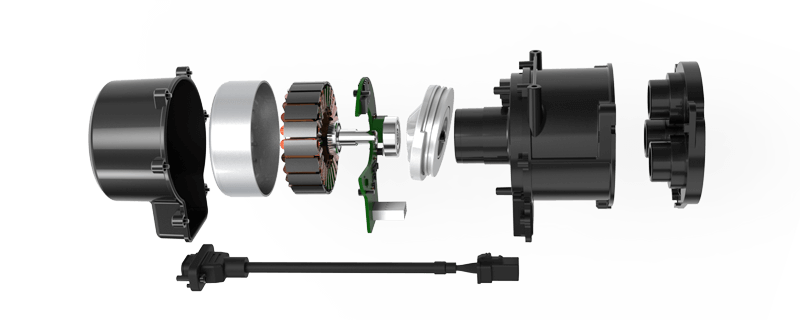
Leveraging innovations in modular drive technology, Kpower integrates high-performance motors, precision reducers, and multi-protocol control systems to provide efficient and customized smart drive system solutions.
Update:2025-10-15
Contact Kpower's product specialist to recommend suitable motor or gearbox for your product.


