The Foundation – Wiring and Basic Code
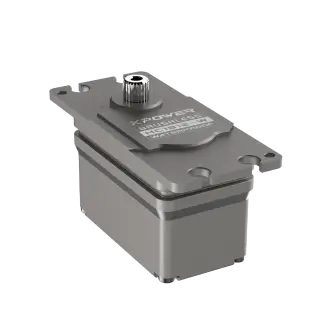
Servo motors are the unsung heroes of robotics and automation. These compact devices translate electrical signals into precise physical motion, making them indispensable for everything from robotic arms to camera gimbals. If you’ve ever wanted to animate a project with smooth, controlled movement, Arduino and servo motors are your gateway. Let’s break down how to get started—no prior robotics degree required.

Why Servos? Unlike standard DC motors, servos offer positional control. Tell a servo to rotate to 90 degrees, and it’ll hold that angle until instructed otherwise. This makes them perfect for tasks requiring accuracy, like steering a remote-controlled car or adjusting a solar panel’s tilt.
What You’ll Need
Arduino Uno (or any compatible board) SG90 micro servo (cheap, widely available) Jumper wires Breadboard (optional but helpful)
Wiring Simplified Servos have three wires:
Brown/Black: Ground (connect to Arduino’s GND) Red: Power (connect to 5V pin) Yellow/Orange: Signal (connect to a PWM-capable pin like D9)
Pro Tip: For larger servos, use an external power supply to avoid overloading the Arduino’s 5V regulator.
The Bare-Minimum Code Let’s write a script to rotate the servo between 0° and 180°. The Arduino IDE’s built-in Servo.h library does the heavy lifting.
```cpp
include
Servo myServo; // Create a servo object
void setup() { myServo.attach(9); // Connect servo signal wire to pin 9 }
void loop() { myServo.write(0); // Rotate to 0° delay(1000); // Wait 1 second myServo.write(180); // Rotate to 180° delay(1000); }
Breaking It Down - `#include `: Imports the library. - `Servo myServo`: Declares a servo object. - `myServo.attach(9)`: Assigns the signal pin. - `myServo.write(angle)`: Sends the target position (0–180 degrees). Upload this code, and your servo should swing back and forth like a metronome. Troubleshooting - Jittery Movement? Ensure the servo’s power isn’t sagging. Add a 100µF capacitor between 5V and GND. - Not Moving? Double-check wiring. The signal wire is often the culprit if connected to a non-PWM pin. Why This Matters This basic setup is the building block for more complex systems. Imagine replacing the `delay(1000)` with sensor inputs—suddenly, your servo could respond to light, temperature, or even Twitter alerts. The possibilities explode once you grasp the fundamentals. Leveling Up – Analog Control and Real-World Applications Now that you’ve tamed the servo’s basic movement, let’s integrate real-world inputs and explore creative applications. Analog Control with a Potentiometer Want manual control? Add a potentiometer (pot) to adjust the servo angle dynamically. Wiring Additions - Connect the pot’s outer pins to 5V and GND. - Middle pin to Arduino’s A0. Code Upgrade
cpp
include
Servo myServo; int potPin = A0;
void setup() { myServo.attach(9); }
void loop() { int potValue = analogRead(potPin); // Read pot (0–1023) int angle = map(potValue, 0, 1023, 0, 180); // Convert to 0–180° myServo.write(angle); delay(15); // Smooths movement }
Turn the pot, and the servo follows. The `map()` function translates the analog input range (0–1023) to servo angles (0–180). Creative Applications 1. Robotic Arm: Combine multiple servos for articulated movement. 2. Smart Blinds: Automate window shades using light sensors. 3. Pet Feeder: Schedule rotations to dispense food. Advanced Tip: Smooth Sweeping Avoid jerky motions with gradual angle changes:
cpp void loop() { for (int angle = 0; angle <= 180; angle++) { myServo.write(angle); delay(15); } for (int angle = 180; angle >= 0; angle--) { myServo.write(angle); delay(15); } } ```
Power Considerations
Bulkier Servos: Use a separate 6V battery pack or a DC adapter. Noise Reduction: Isolate the servo’s power supply from the Arduino’s with diodes.
Debugging Like a Pro
Serial Monitor: Print variables (e.g., Serial.println(angle)) to track values in real time. Pulse Width Tweaking: Some servos respond better to writeMicroseconds(1000–2000) instead of angles.
From Hobby to Prototype Servos aren’t just for tinkerers—they’re used in industrial prototypes and art installations. One developer used servos to create a robotic xylophone striker; another built an automated cocktail mixer. Your project could be next.
Final Thoughts Arduino and servos are a match made in maker heaven. Start small, experiment recklessly, and remember: every complex robot is just a collection of simple motions orchestrated perfectly. What will you automate first?


