The Basics of Arduino Servo Control – Your Gateway to Motion
If you’ve ever wanted to bring your projects to life with precise, controlled movement, Arduino and servo motors are your golden ticket. These compact, powerful devices are the unsung heroes behind everything from robotic arms to animatronic Halloween decorations. But how do you go from blinking an LED to orchestrating smooth, intentional motion? Let’s break it down.

What Makes Servo Motors Special?
Unlike standard DC motors that spin freely, servo motors are precision instruments. They rotate to specific angles (typically between 0° and 180°) and hold their position, making them ideal for tasks requiring accuracy—like steering a remote-controlled car or adjusting a camera mount. Inside a servo, you’ll find a motor, a gearbox, and a feedback circuit that constantly checks the motor’s position. This closed-loop system is what gives servos their magic.
There are two main types:
Standard servos: Perfect for angular control (think robotic joints). Continuous rotation servos: These spin like regular motors but with adjustable speed and direction.
The Nuts and Bolts of Your First Circuit
To get started, you’ll need:
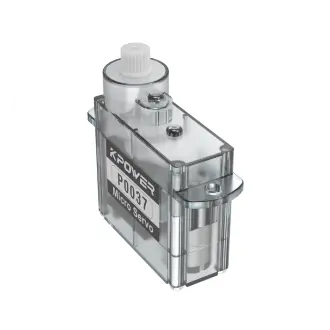
An Arduino Uno or Nano A micro servo (like the SG90) Jumper wires A breadboard (optional but handy) A 5V power supply (for larger servos)
Wiring It Up:
Connect the servo’s brown/black wire to Arduino’s GND. Attach the red wire to the 5V pin. Plug the yellow/orange signal wire into a PWM-enabled pin (e.g., pin 9).
If you’re using a beefier servo (like the MG996R), power it separately with a 6V battery pack to avoid overloading the Arduino’s voltage regulator.
Coding Your First Motion
Arduino’s Servo library simplifies control. Here’s a barebones script to make your servo sweep:
```cpp
include
Servo myServo;
void setup() { myServo.attach(9); }
void loop() { for (int pos = 0; pos <= 180; pos++) { myServo.write(pos); delay(15); } for (int pos = 180; pos >= 0; pos--) { myServo.write(pos); delay(15); } }
Upload this, and your servo will pivot back and forth like a metronome. The `delay(15)` gives it a smooth, deliberate pace—adjust this to make it faster or slower. ### Project Idea: A Sensor-Activated Display Take it up a notch by adding a motion sensor (PIR) to create a servo-powered display that reacts to movement. When the sensor detects someone nearby, the servo swings a sign or figurine into view. It’s a great way to practice integrating sensors with actuators. Why This Matters: Starting with simple circuits builds confidence. By mastering angle control and basic coding, you’re laying the groundwork for more ambitious projects—like building a robot that can wave, point, or even throw a ball. --- Elevating Your Game – Advanced Projects and Pro Tips Now that you’ve got the basics down, let’s explore how servo motors can transform from humble components into the backbone of jaw-dropping creations. ### Multi-Servo Systems: Coordination is Key Want to build a robotic arm with multiple joints? You’ll need to synchronize several servos. The key here is power management. Each standard servo can draw up to 500mA under load, so powering multiple servos through your Arduino’s 5V pin is a recipe for brownouts. Use an external 5V-6V supply connected to a breadboard’s power rails, and wire all servo grounds to the Arduino’s GND for a common reference. For code, the `Servo` library supports up to 12 servos on most Arduino boards. Here’s a snippet for a two-axis arm:
cpp
include
Servo base; Servo elbow;
void setup() { base.attach(9); elbow.attach(10); }
void loop() { base.write(90); // Center position elbow.write(45); // Lowered position delay(1000); elbow.write(135); // Raised position delay(1000); } ```
Real-World Application: Automated Pet Feeder
Combine a servo with a real-time clock (RTC) module to create a timed pet feeder. Program the Arduino to rotate a continuous servo at specific times, dispensing kibble from a hopper. Add an LCD screen for scheduling feedback, and you’ve got a practical (and furry-approved) project.
Troubleshooting Common Issues
Jittery Movement: This often stems from power fluctuations. Add a 100µF capacitor across the servo’s power and ground wires. Inconsistent Positioning: Ensure your servo’s mechanical load isn’t exceeding its torque rating (e.g., the SG90 handles ~1.8 kg·cm). Signal Noise: Keep servo wires away from power lines, and twist signal and ground wires together to reduce interference.
Pushing Boundaries: Unconventional Uses
Servos aren’t just for robotics. Try these:
Interactive Art: Install servo-controlled flaps on a canvas that shift to reveal hidden patterns. Board Game Helpers: Build a servo-driven dice roller or card dealer. Escape Room Gadgets: Create puzzle mechanisms that unlock doors or trigger lights.
The Philosophy of Motion
What makes Arduino and servos so compelling is their ability to turn abstract ideas into tactile reality. Whether you’re automating your home, prototyping a product, or crafting kinetic art, servo motors give you the agency to make things happen. The only limit is your willingness to experiment—and maybe your soldering skills.
So grab that servo, fire up your Arduino IDE, and start building. The next time someone asks, “Can you make that move?”, you’ll already be three steps ahead.


