


Looking for a suitable motor?


小编
Published2025-10-15
This guide delves into the essentials of servo motor connections, exploring the theory, applications, and practical steps to ensure smooth and efficient servo operation. Whether you're a beginner or experienced engineer, this article is designed to provide insightful knowledge about servo motor connection.
servo motor, motor connection, servo motor wiring, motor control, servo controller, electrical connections, step-by-step guide
Understanding Servo Motors and Their Connection
In the world of automation, robotics, and precise motion control, the servo motor plays an indispensable role. Whether it's in industrial machines, robotics arms, or even in hobbyist projects, the servo motor's precision makes it a favorite for tasks that require high levels of accuracy. But before diving into how to connect a servo motor, it's important to first understand what it is and how it works.
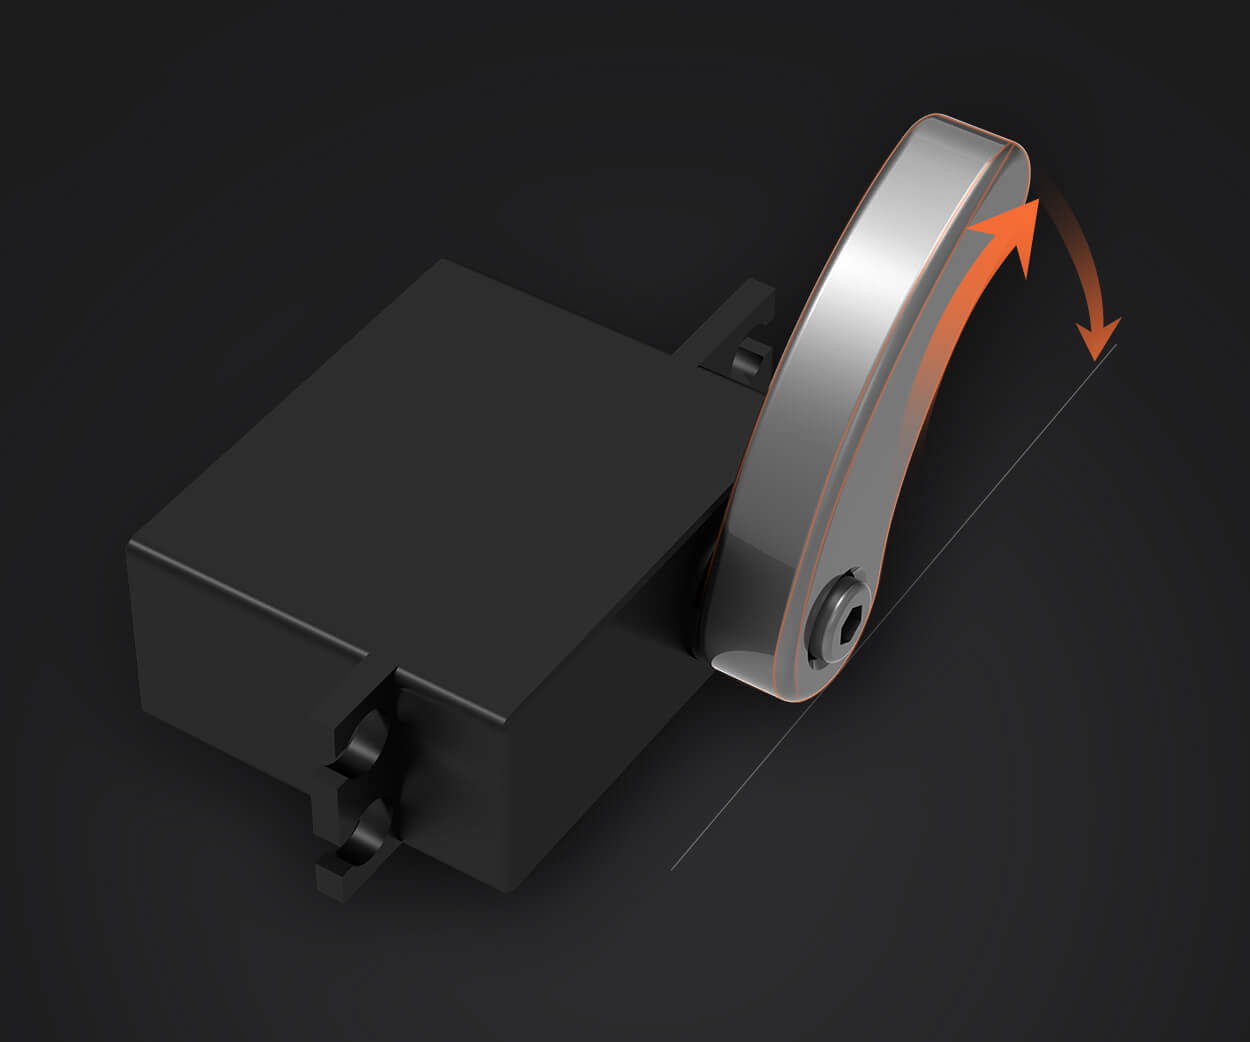
A servo motor is a special type of motor that is used for precise control of angular position, velocity, and acceleration. Unlike traditional DC motors, which rotate continuously, a servo motor is designed to rotate only to specific positions, often in small increments. It achieves this level of precision through an internal feedback loop that monitors its position and makes adjustments as needed.
Servo motors typically come with three main components: a motor, a control circuit, and a feedback device (encoder or potentiometer). The control circuit receives input signals, adjusts the motor's output, and ensures that the motor’s shaft reaches the desired position. This makes servo motors essential for applications that require precision, such as robotic arms, CNC machines, and camera gimbals.
While all servo motors work on similar principles, they come in different types based on their power source and application:
DC Servo Motors: These are driven by a DC power supply and provide high torque at low speeds. They are commonly used in industrial equipment and robotics.
AC Servo Motors: These are used for higher power applications, such as industrial machinery. They are more energy-efficient compared to DC motors and offer smoother motion control.
Pneumatic and Hydraulic Servo Motors: These motors are used when there’s a need for linear or rotary movement with higher force output, often in industrial sectors.
Why Servo Motors Require Special Connections
Servo motors are different from ordinary motors in that they require a specific type of control signal to function correctly. The control signal is usually a Pulse Width Modulation (PWM) signal, which dictates the motor's rotation and speed. Thus, making a proper connection is crucial for ensuring the servo motor operates as expected.
In addition to the PWM signal, servo motors also need power. They typically operate on either a 5V, 6V, or 12V power supply, though this can vary depending on the motor's size and design. Another important factor in servo motor connections is the ground connection, which ensures that all components of the circuit share the same reference voltage, preventing issues related to improper current flow.
Key Components for Servo Motor Connections
When connecting a servo motor, there are several components you need to be familiar with:
Servo Motor: The actual motor that provides motion and position control.
Power Supply: A dedicated power source that can provide the required voltage and current for the servo motor.
Controller/Driver: The device that sends control signals (usually PWM) to the servo motor to determine its position and movement.
Cables and Connectors: To ensure secure and efficient electrical connections between the motor, controller, and power source.
Step-by-Step Process to Connect a Servo Motor
Now that you have a basic understanding of what a servo motor is and its components, let’s walk through the general steps of connecting a servo motor.
Step 1: Identify the Servo Motor Pins
Most hobbyist-grade servo motors come with three wires:
Power (Red Wire): This is where the motor gets its power, typically 5V, 6V, or 12V.
Ground (Black or Brown Wire): This wire provides the return path for current.
Signal (Orange or Yellow Wire): This wire carries the PWM signal from the controller.
Ensure that you have the right power supply for the motor, as applying the wrong voltage could damage it.
Step 2: Connect the Power Supply
Before connecting the servo motor to the controller, the power supply should be connected. For a standard 5V servo motor, connect the red wire to the positive terminal of the power supply and the black or brown wire to the negative terminal. Always ensure that the voltage supplied is within the recommended range for your servo motor.
Step 3: Connect the Signal Line
The PWM signal is typically generated by a microcontroller (such as an Arduino or Raspberry Pi). The orange or yellow wire (signal) from the servo motor should be connected to the appropriate PWM pin on your controller. For instance, if you're using an Arduino, the signal wire can be connected to any digital I/O pin, such as pin 9.
The ground wire from both the servo motor and the controller should be connected to the ground terminal of your power supply. This creates a common reference for all components, ensuring they work together seamlessly.
Step 5: Test the Connections
After making all the necessary connections, it's time to test the motor. You can use a simple code or program to send a PWM signal to the servo motor, instructing it to move to a specific position. Once the signal is sent, the motor should rotate accordingly, verifying that the connections are working as expected.
Troubleshooting and Advanced Considerations for Servo Motor Connections
While connecting a servo motor is relatively straightforward, there are several factors and potential pitfalls to consider in order to optimize performance and prevent issues down the line. Let’s explore some of these advanced considerations and troubleshooting tips.
Troubleshooting Common Servo Motor Connection Problems
1. Servo Motor Not Responding
If the servo motor is not responding to control signals, the first thing to check is the wiring. Ensure that all the connections are properly made—especially the power, ground, and signal connections. If you're using a breadboard or jumper wires, ensure that they are making a secure connection.
Another potential issue could be insufficient power. Verify that the power supply can provide enough current to the motor. If you’re using a low-current power supply or if the servo motor is under heavy load, it may fail to operate correctly.
2. Servo Motor Stuttering or Jittering
If the servo motor stutters or doesn’t move smoothly, it’s likely that the PWM signal is not being generated properly. Check your control signal frequency and pulse width. Typically, servo motors require a PWM frequency of 50Hz, with a pulse width ranging from 1 to 2 milliseconds to control the position. Incorrect values can cause erratic motion.
Also, make sure that the servo is not overloaded. Servo motors have a torque rating, and exceeding that torque can cause the motor to behave erratically or even burn out.
Overheating is a common issue when the servo motor is run continuously or subjected to excessive load. Ensure that the servo is not being overworked and that it’s within its torque limits. If necessary, use a heat sink or provide better ventilation to reduce the chances of overheating.
4. Servo Motor Not Reaching Desired Position
This issue may occur if the servo motor is not calibrated correctly. Some servo motors have mechanical limits that prevent them from reaching extreme positions. Make sure that the control signal is sending the correct pulse width to position the motor accurately. It’s also essential to ensure that the servo motor isn’t blocked by any physical obstacles.
Advanced Considerations for Servo Motor Connections
1. Choosing the Right Power Supply
When connecting a servo motor, choosing the appropriate power supply is crucial. The servo motor’s power requirements depend on the size and model. For high-torque applications, it may require a more robust power supply. If you’re controlling multiple motors, ensure that the power supply can handle the combined current demand.
2. Using a Servo Controller
For more precise control, you may want to use a dedicated servo controller. These controllers provide advanced features such as the ability to control multiple servo motors simultaneously, adjust speed, and even program more complex motion patterns. Servo controllers often simplify the process of generating PWM signals and help offload the work from the microcontroller.
3. Multiple Servo Motors in Parallel
In cases where you need to control multiple servo motors simultaneously, you should consider using a dedicated servo control board. These boards can manage multiple PWM signals and help coordinate the movement of several motors at once. Make sure to account for the total current draw from all the motors to prevent overloading the power supply.
Understanding the connection of a servo motor is critical for getting the best performance out of your projects. Whether you're working with simple hobby projects or complex industrial systems, ensuring that your servo motor is connected properly can make all the difference. From selecting the correct power supply to troubleshooting common issues, following the right procedures and being mindful of the technical details can help you achieve smooth and precise motion control.
Kpower has delivered professional drive system solutions to over 500 enterprise clients globally with products covering various fields such as Smart Home Systems, Automatic Electronics, Robotics, Precision Agriculture, Drones, and Industrial Automation.
Update:2025-10-15
Contact Kpower's product specialist to recommend suitable motor or gearbox for your product.


