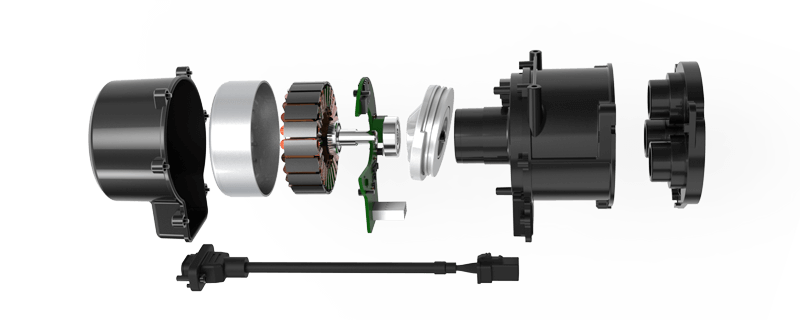
Unleashing the Power of Servo Motors in DIY Projects
Imagine the thrill of transforming a simple motor into the heart of a sophisticated robotic arm or a remote-controlled vehicle, all with a few components and a dash of coding. That’s the magic of servo motors—compact, precise, and incredibly versatile devices that have revolutionized the world of DIY electronics. When combined with Arduino microcontrollers, they form a dynamic duo that opens up endless possibilities for hobbyists, students, and professionals.

What Is a Servo Motor? At its core, a servo motor is a rotary actuator that allows for precise control of angular position, velocity, and acceleration. Unlike standard motors that spin freely when powered, servos are equipped with a built-in feedback mechanism (usually a potentiometer) and a control circuit that enables accurate positioning. They are commonly used in radio-controlled devices, robotics, automation systems, and anywhere precise movement is needed.
There are various types of servo motors—analog, digital, and hobby servos being the most prevalent in amateur projects. Hobby servos, in particular, are popular because they are inexpensive, readily available, and easy to interface with microcontrollers like Arduino. They typically operate within a range of 0 to 180 degrees, making them suitable for a wide array of applications.
Getting Started with Arduino and Servo Motors Arduino, a user-friendly microcontroller platform, has democratized access to electronics and programming. Its open-source hardware and extensive community support make it an ideal choice for bringing your ideas to life. When you connect a servo motor to an Arduino board, you can control its position with a simple program—an absolute game changer in robotics and automation.
Imagine writing a tiny script to make a robotic arm pick up and place objects, or creating an automated camera gimbal that follows your face. The combination of Arduino and servo motors provides the fundamental tools needed to design, prototype, and deploy functional projects.
Practical Applications of Servo Motors in DIY Projects From animatronics to home automation, servo motors play a pivotal role in modern DIY projects. Here are a few captivating examples:
Robotic Arms: Controlled with multiple servo motors, robotic arms can mimic human movements. With precise coding, they can assemble small objects, paint, or even assist in delicate tasks. Camera Gimbals: Stabilize cameras for smooth video recording by actuating servos to counteract movement. Automated Doors and Windows: Use servos to open or close doors/windows based on sensor input or scheduling. Animatronics and Puppetry: Bring inanimate figures to life with coordinated movements powered by servo-driven mechanisms. Educational Robots: Build line-following bots, obstacle avoiders, or maze solvers—perfect for learning programming and electronics.
Understanding the Control Signal Servo motors are controlled via Pulse Width Modulation (PWM). A typical control signal involves a series of pulses (usually 1-2 milliseconds wide) sent at a regular interval (around 20 milliseconds). The width of the pulse determines the angle of the servo shaft: for many servos, a 1 ms pulse corresponds to 0°, 1.5 ms to 90°, and 2 ms to 180°.
Arduino simplifies this process through built-in libraries that abstract the complex timing, allowing you to set the servo position responsively and accurately. This means you can write scripts that move your servo to specific positions instantly or gradually, depending on your project needs.
Introducing Tinkercad: Your Virtual Lab While experimenting with real hardware is ideal, it can sometimes be costly or impractical, especially for beginners. Enter Tinkercad—an online, browser-based circuit simulation platform developed by Autodesk. Tinkercad Circuits allows you to design, simulate, and test electronic circuits without soldering or physical components.
Using Tinkercad, you can drag and drop Arduino boards, servo motors, sensors, and more, to create virtual prototypes. This environment is perfect for learning, troubleshooting, and refining your designs before moving to real-world implementation.
How to Use Tinkercad for Servo Motor Projects Getting started is straightforward:
Create an account at Tinkercad and navigate to the Circuits workspace. Drag an Arduino Uno onto the workspace. Add a servo motor to your circuit. Connect the servo’s power lines (red and black) to the Arduino’s 5V and GND pins. Connect the control (signal) wire to a digital pin on the Arduino (e.g., pin 9). Use the code editor to write your control code, utilizing the Arduino Servo library. Run the simulation to see how your servo responds to different code commands.
Sample Tinkercad Code Snippet
#include Servo myServo; void setup() { myServo.attach(9); } void loop() { myServo.write(0); // Move to 0 degrees delay(1000); myServo.write(90); // Move to 90 degrees delay(1000); myServo.write(180); // Move to 180 degrees delay(1000); }
This simple code cycles the servo through its range, demonstrating how easy it is to control movement programmatically.
Stay tuned for Part 2, where we’ll dive deeper into practical project ideas, advanced control techniques, troubleshooting tips, and how to transition from simulation to real-world builds.
Kpower has delivered professional drive system solutions to over 500 enterprise clients globally with products covering various fields such as Smart Home Systems, Automatic Electronics, Robotics, Precision Agriculture, Drones, and Industrial Automation.


