part 1:
Unleashing the Potential of Arduino with Servo Motors: A Journey into Innovation
Imagine a world where your ideas can leap off the page and come alive—turning simple components into intelligent machines that respond to your commands with precision and grace. Welcome to the fascinating realm of Arduino and servo motors, a duo that has transformed the DIY electronics scene into a playground of endless possibilities.

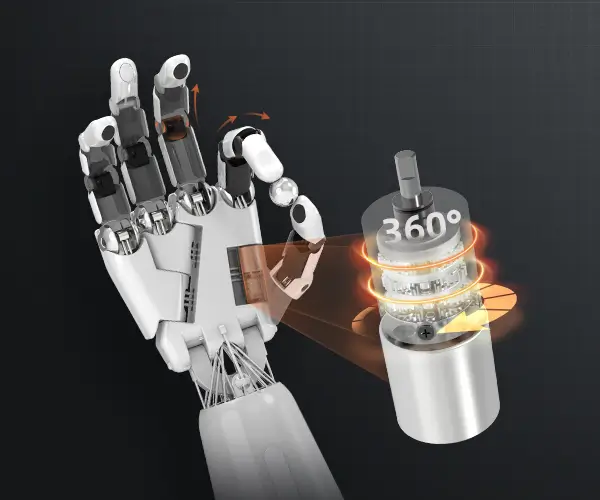
At its core, Arduino is an open-source microcontroller platform designed to make electronics accessible to everyone—from complete beginners to seasoned engineers. Servo motors, on the other hand, are compact, precise actuators that can rotate to specific angles based on electrical signals. When combined, these tools empower inventors to create everything from robotic arms that mimic human movements to automated curtain systems, and beyond.
Why Choose Arduino and Servo Motors?
Because they’re accessible, affordable, and versatile. Arduino boards like the Uno or Mega are inexpensive and have a vibrant community supporting their every move. Servo motors are equally affordable, often costing less than a few dollars each, and are easy to interface with Arduino.
What makes servo motors particularly appealing is their ability to hold a position with torque, meaning they can maintain or hold a specific angle against resistance—think of a camera gimbal or a robotic finger. This makes them perfect for projects requiring controlled movement precision.
Getting Started: Basic Concepts and Components
Before jumping into projects, a solid understanding of how servo motors work and what components you'll need sets the stage for success.
1. The Servo Motor Basics
A typical servo motor has three wires: power (usually red), ground (black or brown), and signal (white, yellow, or orange). The signal wire receives pulse-width modulation (PWM) signals from the Arduino, which determine the position of the servo arm.
Most servo motors rotate approximately 180 degrees, though some high-torque or industrial versions extend this range. The control is achieved through a pulse every 20 milliseconds, with the width of the pulse (typically between 1 to 2 milliseconds) dictating the angle.
2. Key Components for Projects
Arduino Board: The brain behind the project. Options range from Arduino Uno (great for beginners) to Arduino Mega (more pins for complex projects). Servo Motor: The actuator that moves and positions. Power Supply: While Arduino can power some servos via the 5V pin, larger or multiple servos often require an external power source. Jumper Wires and Breadboard: For wiring and prototyping. Additional Sensors: For advanced projects, sensors like distance detectors, buttons, or potentiometers augment interactivity.
Beginner Projects to Spark Your Creativity
To get your hands dirty and your imagination flowing, here are some beginner-friendly projects that showcase what you can do with Arduino and servo motors:
1. Servo Sweep — The Classic Intro
This is the simplest project to understand PWM control. It involves programming the servo to move between 0 and 180 degrees smoothly in a loop. It’s a perfect foundation to grasp the basics of servo control and Arduino coding.
2. Automated Turntable
Imagine building a mini turntable that rotates to specific angles to display jewelry or products. By programming the servo to move to set positions, you can create a precise, automated display stand. This project introduces concepts of position control, timing, and even basic automation.
3. Robotic Arm Basics
Using a single servo, create a simple robotic arm segment that you can manually control through potentiometers or buttons. This introduces the concept of direct user input, and sets the stage for multi-servo systems.
4. Interactive Door or Lid Opener
Build a small model door that opens or closes with a servo controlled by a switch or sensor (like a light sensor). This can be expanded into home automation concepts or fun interactive exhibits.
The Power of Combining Components: Multi-Servo Systems
Once familiar with single-servo projects, the next step is to explore systems involving multiple servos working together. For example, a simple robot that can move its limbs or head in coordinated motions mirrors real-world applications such as humanoid robots and animate displays.
Multi-servo projects often require careful power management, as multiple motors draw more current. It is advisable to power servos externally and connect their grounds to the Arduino ground to maintain stable operation.
Tips for Scaling Up Projects:
Use servo controllers like the PCA9685 for managing multiple servos via I2C communication, freeing up Arduino pins. Implement feedback mechanisms with sensors for more sophisticated control, such as proportional or position-based movements. Factor in mechanical design using 3D printed parts or craft materials to create stable structures.
Would you like to delve into more specific project ideas, detailed step-by-step tutorials, or perhaps some tips on troubleshooting common servo issues? Your exploration has only just begun, and the horizon of what you can build with Arduino and servo motors is vast and inviting.
Stay tuned for Part 2, where we’ll explore advanced projects, integration techniques, programming tips, and how to turn your creative ideas into tangible innovations.
Established in 2005, Kpower has been dedicated to a professional compact motion unit manufacturer, headquartered in Dongguan, Guangdong Province, China.


