Imagine a world where your ideas come alive at the push of a button or a simple command—robots that wave, camera gimbals that stabilize, automated doors that open smoothly, and intricate art installations that respond to your touch. All these innovations trace back to a humble yet mighty partner in the maker universe: the servo motor.

At the heart of many robotics and automation projects lies the challenge of precise movement control. That's where Arduino—a user-friendly, versatile microcontroller—steps in as the perfect conductor, orchestrating the dance of mechanical parts with digital precision. When combined with a servo motor, Arduino transforms from a basic circuit builder into a masterful creator capable of complex, dynamic motion.
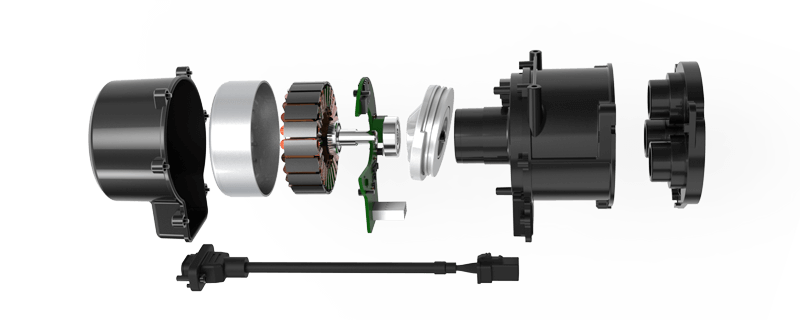
What is a Servo Motor? Before diving into interfacing, it's essential to understand what makes servo motors special. Unlike regular motors that run continuously, servo motors provide controlled angular movement within a specified range—usually 0 to 180 degrees. They consist of a DC motor, a feedback sensor (usually a potentiometer), and a control circuit. This internal feedback allows the servo to accurately reach and hold a specific position based on signals it receives.
Why Use a Servo Motor with Arduino? The synergy between Arduino and servo motors is seamless and powerful. Arduino simplifies control through its programming language and predefined libraries, making it accessible even to beginners. Servos, on the other hand, are straightforward to interface because they require only a few connections and can be commanded to move to specific angles with simple code.
Getting Started: Components Needed To start your journey, gather the following:
Arduino board (Uno, Mega, Nano, etc.) Servo motor (commonly SG90 or MG996R for hobby projects) Breadboard and jumper wires Power supply suitable for your servo A computer with Arduino IDE installed
Wiring the Servo to Arduino The basic connection is straightforward:
The red wire (power) connects to 5V on the Arduino. The black or brown wire (ground) connects to GND. The yellow or white wire (signal) connects to a digital PWM pin, typically pin 9 or 10.
It’s crucial to power the servo properly, especially for multiple servos or larger models. Using the Arduino's 5V pin may suffice for a small servo, but for intensive use, a dedicated power supply is advisable to prevent voltage drops that can cause erratic behavior.
First Code: Moving the Servo Once you've wired everything, open the Arduino IDE and load this basic sketch:
#include Servo myServo; void setup() { myServo.attach(9); // Attach servo to digital pin 9 } void loop() { myServo.write(0); // Move to 0 degrees delay(1000); // Wait 1 second myServo.write(90); // Move to 90 degrees delay(1000); // Wait 1 second myServo.write(180); // Move to 180 degrees delay(1000); // Wait 1 second }
Upload this code and watch your servo dance through its motions. It’s a simple yet powerful demonstration of how Arduino can command a servo to move precisely to specific angles.
Understanding the Code This code uses the Servo library, which simplifies control. myServo.attach(9); designates pin 9 to output PWM signals that control the servo. myServo.write(angle); sets the servo to the specified position. The delay() calls create pauses, making the motion observable.
Important Tips for Smooth Operation
Always power your servo separately from the Arduino if running multiple units. Beware of the servo’s rating; pushing it beyond its range can cause damage. Use capacitors or filters if you notice jittering or unstable movements. Experiment with different angles and delays to understand the servo’s behavior.
Expanding Your Project This basic control setup lays the foundation for more advanced projects:
Robotics arms with multiple servos for complex motion. Pan-and-tilt camera systems for surveillance or creative filming. Animatronic installations and interactive artwork. Automated blinds, gates, or other home automation solutions.
The Road Ahead Once you're comfortable with basic movements, you can explore concepts like:
Creating custom movement sequences and routines Implementing feedback sensors to achieve closed-loop control Programming servos to respond to external inputs like sensors, buttons, or remote controls
The key is to experiment, learn, and integrate your creativity. Arduino and servo motors open up limitless opportunities—your only boundary is your imagination.
Would you like to see the continuation with more advanced interfacing techniques, troubleshooting tips, or creative project ideas to keep your exploration going?
Established in 2005, Kpower has been dedicated to a professional compact motion unit manufacturer, headquartered in Dongguan, Guangdong Province, China.


